New Website and New Look | Angelsea Urban | New Jersey Lifestyle Photographer

Ya know that old saying, “Oh I’ll just do this for now, and later on I’ll tweak it?”

So, that was me over a year ago when I switched website hosts to Showit and integrated a separate website + blog instead of a blog site. I quickly added a splash page, and linked everything to my existing blog. “Later on” I’ll make it how I REALLY want it to look. AYE.

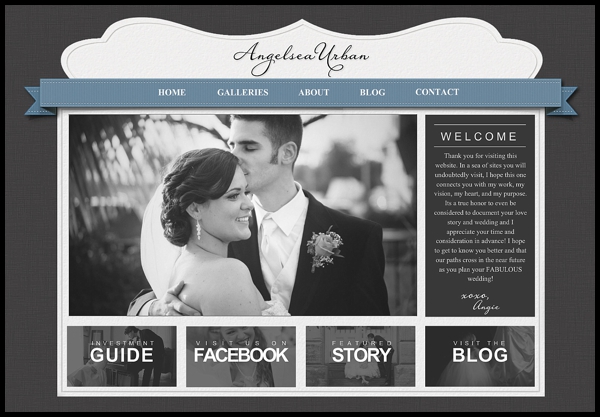
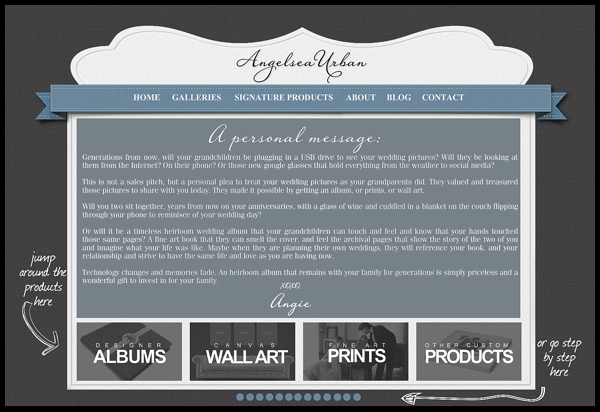
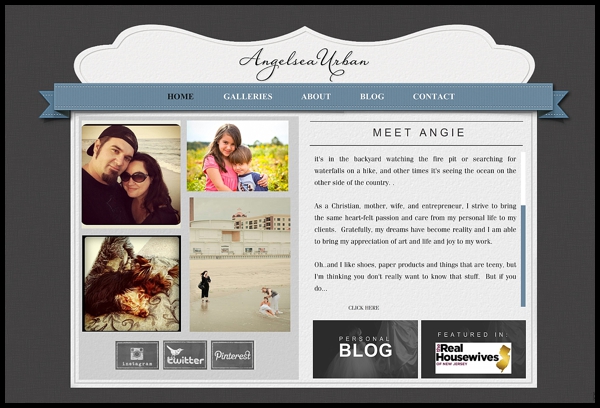
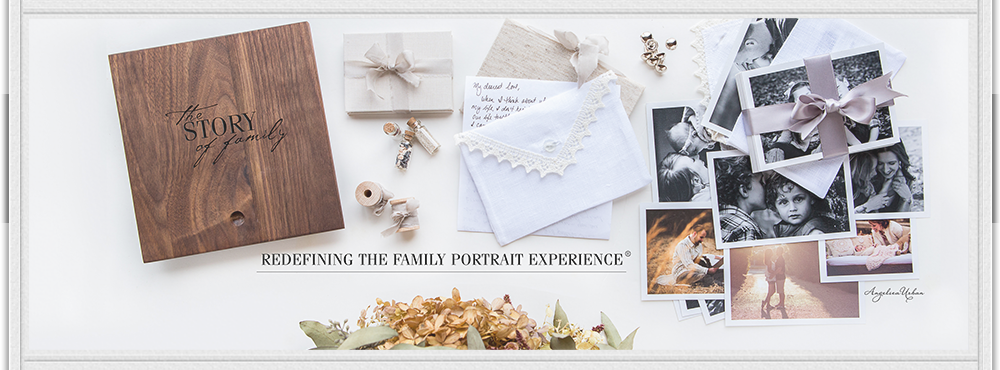
It will actually be 3 (yes THREE) websites but I promise it will be easy to navigate. Shooting weddings, portraits and newborns, equally, I thought it was about time to give my clients the custom experience they deserve, each time they work with me. Whether it’s for their wedding, their newborn baby, or their family portrait, I wanted them to have a unique experience for that particular occasion.

So here is a sneek peek of what is to come (hopefully soon) and a sneek peek and the overall new look for 2013! In between making homemade honey barbque sauce (which turned out delicious I must say) and watching the superbowl, I was putting the final touches on the wedding website.

Can’t wait to finish up and share!


"Like" this post ~ ~ Facebook~ Pinterest~ Email

Hurricane Sandy: 3 months later at the Jersey Shore | Angelsea Urban New Jersey Lifestyle Photographer

It’s been nearly 3 months since Hurricane Sandy landed at the Jersey Shore and tore apart our coast from end to end. In some ways I’m amazed to see how far the recovery efforts have come. The debris that littered streets everywhere in my own neighborhood was cleaned up quickly. Traffic lights that were shredded from so many posts were replaced. The kids were back in school and contractors have never been busier with work. The new inlet in Mantaloking was filled in with sand at an attempt to rebuild the earth. I have stopped seeing the trucks from the American Red Cross at every corner and life was getting back to normal. For me anyway.

It doesn’t take a long drive down the street to quickly realize just how lucky my own neighborhood was. Less than a mile from my home entire neighborhoods were destroyed. Family still displaced, staying with friends or renting homes closer inland. But even our town faired better than others. Just a few miles up the coast still looks like day one from Hurricane Sandy’s landfall. Even 3 months later.

I recently visited the boardwalk at Seaside Heights. My first time since this session here just 4 days before the storm. The last piece of fudge still sits in it’s plastic waiting to be replaced one day.

I wanted to see for myself how far along it had come and not just by pictures in the news.

Just coming off the bridge I was met with the big Army trucks once again, a familiar greeting from where I visited LBI for the first time since it reopened, which I wrote about here. Police vehicles were stationed at every corner, my guess was to prevent looters from entering all of the empty and gutted homes. It was a ghost town. Too many houses had a bright pink letter hanging on it from being condemned. Almost every, single, one. There was a ton of activity from construction vehicles and filled dumpsters everywhere. Not that they were usable because the debris still stacked a story high on every street. There were not enough dumpster for even one block.


The initial outpour of volunteers and donations has quieted down. I saw this flyer in Home Depot the other day and thought I would pass it along to those who need it. Help is still available, as is the opportunities to volunteer. And likely will be for a long time. Please consider reaching out to someone in your community and pass this information along. Thank you. 🙂

"Like" this post ~ ~ Facebook~ Pinterest~ Email

Photographer’s Business Toolbox | Urban Resource Group

Happy First Day back to work. 🙂

As you settle in to your desk this morning and ponder how you are going to tackle this year BIG list, I invite you to read this post during your back to work post New Year’s Eve recovery.

THE PHOTOGRAPHER’S BUSINESS TOOLBOX

INTRODUCTORY SALE 

New products and services will be added throughout the year so be sure to check back often.

**********Announcing the winners to our give away below!

Be sure to follow: 

FACEBOOK: AngelseaUrban

INSTAGRAM: AngelseaUrban

 TWITTER: AngelseaUrban

OFFICIAL HASHTAG: #urbantoolbox

~

CLICK ON THE IMAGE TO VISIT THE WEBSITE:

Annnnnnnnd announcing the winners to our giveaway: First Prize goes to Lacey Buchorn who gets a choice of any single download in the entire store – FREE. Second Prize goes to Kristin Ungerecht who gets 50% off any single download. Lacey and Kristin, shoot me an email so I can get you the download codes. 🙂

Hope you all have a wonderful, happy, and prosperous New Year!


XOXO,
Angie

"Like" this post ~ ~ Facebook~ Pinterest~ Email

Introducing the Photographer’s Business Toolbox | Angelsea Urban

You’ve had time to celebrate and ring in the New Year. You’ve hopefully chugged the recommended amount of coffee and fluids required for New Year’s Day.

You may still be in your pajamas. On the couch starting to put the wheels in motion of what this year may look like. And what tools you may need to start the year on the right foot.

I’ve got a little something for you to help you out and start 2013 out the right way.

~

THE PHOTOGRAPHER’S BUSINESS TOOLBOX

INTRODUCTORY SALE 

New products and services will be added throughout the year so be sure to check back often.

Announcing the winners to our give away below!

Be sure to follow: 

FACEBOOK: AngelseaUrban

INSTAGRAM: AngelseaUrban

 TWITTER: AngelseaUrban

OFFICIAL HASHTAG: #urbantoolbox

~

CLICK ON THE IMAGE TO VISIT THE WEBSITE:

Annnnnnnnd announcing the winners to our giveaway: First Prize goes to Lacey Buchorn who gets a choice of any single download in the entire store – FREE. Second Prize goes to Kristin Ungerecht who gets 50% off any single download. Lacey and Kristin, shoot me an email so I can get you the download codes. 🙂

Hope you all have a wonderful, happy, and prosperous New Year!


XOXO,
Angie 

"Like" this post ~ ~ Facebook~ Pinterest~ Email
March 1, 2016 - 3:59 pm

Anastasia - That’s something I sugtgrle with too some days I feel completely in the zone, others I wonder whether I’m coming or going.At work most days I have regular interruptions, which lead me off on wild goose chases. If I don’t say no I end up feeling like I’ve worked hard all day and achieved nothing. I know what you mean about working when no-one else is. Sometimes I start work at 6.30am for a 8,30am start, and the strange thing is that the part of the morning I get paid for (8.30 12.30) seems to last longer than if I’d got in at 8.30. It’s like I’ve had the mental space to find focus, and the focus actually stretches time out somehow.I think that’s the key thing for me focus gives me the flow you’re talking about I have my objective, and I’m not getting distracted.My main challenge though is to do that when the whole factory is knocking on the door asking me to deal with urgent irrelevances (they often are). Personal organisation flavour of the month in December was planning work at the start of the day, estimating the duration in 30min chunks, then working through the list marking off when I’ve done a full chunk without allowing myself to be distracted, or anyone else from drawing me away. I note them down on the task list, and at the end of the day I can see how much of my time I’ve spent on key projects. The shock was that to begin with I sugtgrled to spend 1h per day achieving key goals!! I’m working on improving that in the new year Keep writing your posts I’m enjoying reading them, running a business is something I’d like to come back to one day Jon

CUSTOM PACKAGING DVD/CD SLEEVES | ANGELSEA URBAN LIFESTYLE PHOTOGRAPHER

Last year I had a lot of inquires about the packaging sleeves on my DVDs and where I get them from.

So – here’s the kicker – I’m a total paper and textile junkie and I actually hand make every single one of them, custom, for each and every client. When I started making these about 3 years ago it was a little time consuming, but once I finalized my pattern, I could actually make one from start to finish in about 5 minutes. Although I have recently upgraded to custom USB flash drives and PASS instead for image delivery, there are still many who wanted to learn to apply this pattern in other kinds of paper crafts or packaging ideas such as accordion mini books (see bottom). I have really loved making these for my clients. Hand selecting each paper and coordinating each ribbon and embellishments to match the session and client was always a fun craft project for me. It also meant a lot to me that my packaging, along with my images, was a complete custom boutique experience for my clients. I hope this inspires you to create something new and handmade.

STEP BY STEP PICTORIAL: 

To create a custom DVD/CD Envelope start with regular 12×12 Scrapbook Paper (double sided works great too, but stay away from the cardboard stock kind – it gets too thick and doesn’t crease well).

Find center of paper and create an X lightly in pencil, then using the clear case as a guide find 5” from bottom corner and crease upwards aligning the corner with the center line

Reinsert the case, find and crease the 2nd line, then remove case to permanently crease with tool. (I finally bought a little Martha Stewart creaser tool because I was making LOADS of these sleeves and it really did help make the process go faster. In the beginning I just used something like a marker or butter knife.)

Repeat this process for both sides.

Using an xacto knife cut out the corners (I’ve marked in pencil to demonstrate). Also a handy little Martha Stewart tool from the scrapbook supply store such as Michaels or A.C. Moore.

Next, mark, crease and fold the top down

Tuck inside & under the excess that meets the bottom of the jacket

With crease tool, refold sides in to reinforce final crease so you get nice clean sides

Reinsert case for final test fit, checking all corners and making and adjustments.

Mark a crease for the thumb opening on each side. Then open jacket to make that crease. Repeat for other side.

Final test fit before gluing. Then open up and glue in spots indicated.

Reinsert case for final glue and fitting. Glue corners, being mindful of their alignment. (The glue used is also from scrapbook section of any discount supply store or even Walmart or Staples. Any double sided “goo” will work just fine. As long as it is not a wet glue and doesn’t need time to dry.)

And THAT’S IT! ALL DONE! Now if you are using double sided paper, the inside will look just as beautiful as the outside. This was all done using (one) 1 sheet of 12×12 scrapbook paper.

If you are not using a double sided paper, and you don’t like the look of the inside of your sleeve, you can use a second sheet to cover the inside. Either in a duplicate of the same pattern, or a coordinating sheet.

Cut out an inside cover using another piece of matching or coordinating paper slightly smaller than final product. Apply glue on all sides and slide in to secure carefully. Then all set and ready to decorate.

Depending on the pattern, the color of the paper, the style of the paper, the session, the client, their decor and taste, will all determine what I do with the sleeves. As a custom handmade gift to them, this part is less about my “branding” or marketing and more about making them something that is special just for them, with THEM in mind. My “branding” is already in the boutique experience with custom lifestyle photography and with receiving a handmade custom sleeve. The look of the sleeve is all about the client.

Here are a few ideas of the same pattern with a single 12×12 sheet of scrapbook paper:


The only part of the ribbon (on the front) that is glued or double sided tape if the ribbon is wide enough, is the small section in the middle. I flip it over (picture on bottom right) and use that as a holder to insert a thank you card, print care card, and license. The whole thing then gets wrapped up and sealed with tissue and stickers.

The bottom two images show custom 3×3 accordion mini’s books made the same exact way. For these, I use the same 12×12 sheet cut in half diagonally, and you can make 2 sleeves from one 12×12 sheet. Otherwise, the pattern is exactly the same. You will just need to clip off some excess on the sides, which will be obvious when you try to fold it together.


 I hope you found this post helpful and please feel free to message me any questions you have or PLEASE post a link to a picture if you make one. I’d LOVE to see it!

HAPPY NEW YEAR! 🙂
XOXO,


"Like" this post ~ ~ Facebook~ Pinterest~ Email
December 31, 2012 - 12:38 pm

Katie Yuen - Wow those are BEAUTIFUL Angie! You are so creative!!!!